Putting on Ski Boots Easier
Home > Putting on Ski Boots
Easier way to put on ski boots
Getting into ski boots correctly is key to ensuring a comfortable and fun experience on the slopes. Whether you are a beginner or a seasoned skier, the process can sometimes be tricky. However, with the help of the Ski Boot Horn, putting on your boots becomes effortless. This simple tool helps ease the process, ensuring your boots fit perfectly and comfortably. Here’s how to put on your ski boots, buckle them up, and ensure they fit properly, with the added benefit of the Ski Boot Horn.
Step 1: Preparation and Inserting Your Foot into the Boot
1. Wear the Right Socks: Begin by wearing thin, moisture-wicking ski socks. Avoid thick socks, as they can create unnecessary pressure inside the boot, potentially causing discomfort. Thin socks also ensure a more accurate fit. Make sure the socks are pulled up properly, with no wrinkles or bunching.
2. Open the Boots: Loosen all of the buckles and unfasten any Velcro straps or power straps on the boot. This will allow the boot to open wide enough for you to insert your foot easily.
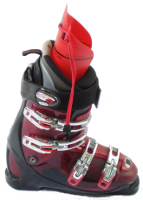
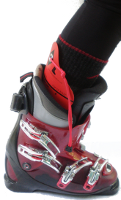
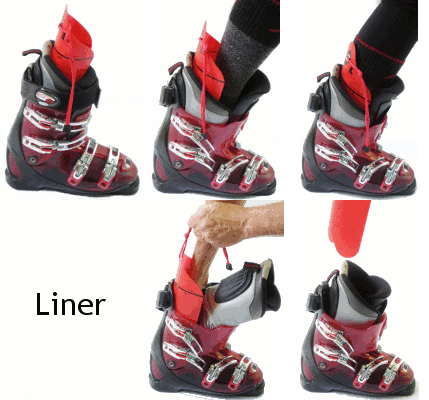
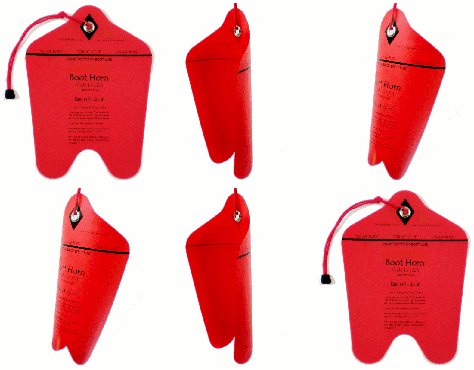
3. Insert the Boot Horn: The Ski Boot Horn is a game-changer, making the process of putting on your ski boots much easier. Simply place the horn at the heel of the boot, with the slick side facing in, then slide your foot in for a smooth entry. Once your foot is in, remove the horn — just be sure your foot isn’t on top of it to avoid strain.
4. Position Your Foot and Heel: Ensure your foot is properly positioned at the heel of the boot. Your heel should be firmly against the back of the boot. This is crucial for proper alignment and control while skiing. Wiggle your toes slightly to ensure they aren’t cramped but are comfortably inside the boot.

1. Insert Boot Horn into boot

2. Slide your foot into boot

3. Remove Boot Horn - Go Ski

Putting on Ski Boots Easier!
Step 2: Buckling Up the Boots
1. Tighten the Upper Buckles First: Start by buckling the lower cuff buckle (the second buckle from the top), followed by the top buckle. These buckles secure your shin to the front of the boot, helping transfer the most energy to your skis. Tighten them one at a time until you feel a firm, but not painful, hold. After securing these buckles, slightly flex forward to help your heel slide into place at the back of the boot.
2. Secure the Lower Buckles: Next, buckle the instep or lower toe buckles. These buckles serve more as holders and don’t need to be tightened too much. Buckling them too tight could lead to a loss of circulation in your toes.
3. Check the Velcro or Power Strap: Many ski boots come with a Velcro or power strap, usually at the top of the boot. This strap allows you to fine-tune the tightness around your shin and lower leg. Fasten this strap firmly, ensuring that your calf is held securely in place.
4. Ensure Even Tightness Across All Buckles: As you buckle up, make sure the tightness is even across all buckles. If one buckle is tighter than the others, it could lead to discomfort or affect your control on the slopes. After all the buckles are fastened, check that the boot feels evenly snug around your foot, ankle, and lower leg.
Step 3: Adjusting the Fit
1. Heel Lift Check: With the boots fully buckled, check for heel lift. Heel lift occurs when your heel moves up and down inside the boot as you walk or flex. A small amount of heel lift is normal, but excessive heel lift means your boots may be too loose or the buckles may not be tight enough. Adjust the buckles or consider using a custom insole to improve the fit.
2. Toe Room Check: Once your boots are secured and you’re standing, wiggle your toes. You should have some room to move them, but not too much. Your toes should lightly touch the front of the boot when standing upright but shouldn’t be cramped or bent. When you bend your knees into a skiing position, your toes should move slightly away from the front of the boot.
3. Adjust the Tightness if Needed: If you notice any discomfort, feel uneven pressure, or have difficulty moving your foot, make small adjustments to the buckles for a more comfortable and secure fit. You want the boots to be snug but not painful.
Step 4: Final Check and Ready to Ski
1. Walk Around: After securing the buckles and adjusting the fit, take a few steps to check for comfort. Walk around to ensure the boots feel secure, with no tight spots or discomfort. If something feels off, adjust the fit as needed.
2. Final Adjustments Before Skiing: If you’re still unsure about the fit after walking around, make any final adjustments before hitting the slopes. Ski boots should be tight enough to provide support but comfortable enough to allow blood circulation to your toes.
3. Ready to Ski: Once you’re comfortable with the fit and have ensured the boots are properly buckled and adjusted, you’re ready to ski! The snug fit of the boots will provide optimal control and performance as you ski down the slopes.
Helps when putting on Ski Boots
Put Ski Boots on easier using our Ski Boot Horn!
Putting on Ski Boots Easy
Put on Lace Up Liner Race Ski Boots Easier!
Tips for a Comfortable Fit
Don’t Over-tighten: While you want your boots to feel secure, over-tightening can cause discomfort and affect circulation. Tighten the buckles gradually and avoid excessive pressure.
Keep Your Boots Warm: Cold boots are much harder to put on, so keep your boots inside overnight or warm them in the car before heading out to ski.
Break Them In: New ski boots may feel stiff initially. Over time, they will mold to the shape of your foot, improving comfort.
Consider Custom Footbeds and Heat-Molded Liners: If you experience pressure points or discomfort, custom insoles or footbeds can improve the fit and support. Heat-molded liners use heat to soften the liner material, allowing it to mold to the unique shape of your foot.
Monitor Fit During Skiing: Periodically check your boots for discomfort during your skiing session. Changes in snow conditions or terrain may require small adjustments.
Essential Tool for your Ski Kit
With the Ski Boot Horn helping you effortlessly slide into your boots and these simple steps to buckle them up, you’ll enjoy a perfect fit that keeps you comfortable and supported throughout your ski day. Spend less time struggling with your boots and more time enjoying the slopes!

